If you’re looking to elevate your Facebook strategy, publishing Reels on Facebook is the answer. These concise, entertaining videos allow you to highlight your brand’s distinct character, share practical advice, or just let loose and have fun. Best of all, Reels can introduce you to a whole new group of potential customers and send your engagement numbers skyrocketing.
But how exactly do you publish reels on Facebook? Don’t worry, I’ve got you covered. In this post, we’ll walk through the process step-by-step, from creating your reel to hitting that “publish” button with confidence. No fancy equipment or editing skills are required – just your creativity and a willingness to experiment.
Alright, it’s time to roll up our sleeves and start crafting some incredible reel magic together!

The Weekly Video Insider
Subscribe for weekly insider trends and tools for YouTube and Social Video

Creating Your Reels
The first thing you’re going to do is open up the Facebook app. Head over to your profile by clicking on your profile picture in the upper left-hand corner.
Once you’re on your profile, scroll down until you see the “Reels” section. This process is very straightforward, but there are a few options you may not know about.

Steps
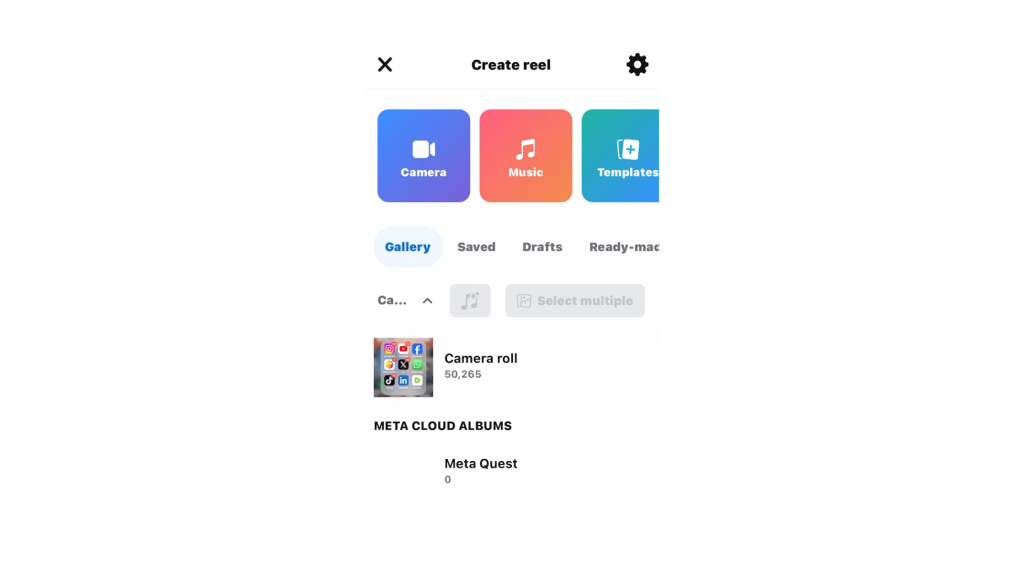
- Click on “Create Reel”: You’ll see a tab that says “Create a Reel.” Click on it to start the process.
- Select Your Video: Choose the video you want to upload.
- Edit Your Reel: Once you’ve selected your video, you’ll enter the reel maker where you can finish editing.
Extra Tips
Saving Options: After creating your reel, you can save it as a draft or download it if you made some edits. Drafts are saved for 60 days.
Drafts: You can upload multiple reels at one time and save them as drafts. This is particularly useful if you’re using tools like Opus software to create multiple reels quickly.

Choosing the Perfect Reel Cover Thumbnail

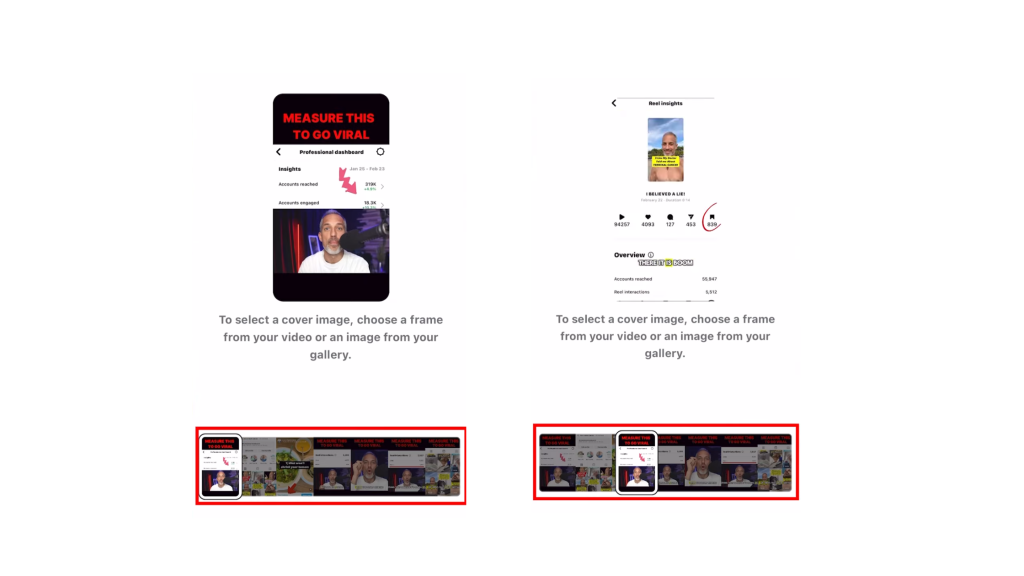
One of the most crucial parts of uploading a reel is picking the right thumbnail image. This shouldn’t be overlooked because thumbnails can significantly affect your clicks and views.
This is particularly important for smaller creators who need every advantage to get noticed. Your thumbnails should be designed to capture attention immediately.

Steps
- Click on Thumbnail: While editing your reel, click on the thumbnail option.
- Designing Your Reel: We always design our reels with the first frame in mind. This first frame often serves as our thumbnail.
- Options for Thumbnails: You can upload a separate image from your gallery if you prefer a more customized look.
- Positioning: Move the cursor to the spot where you’d like the cover image to be.
Adding Reels Description

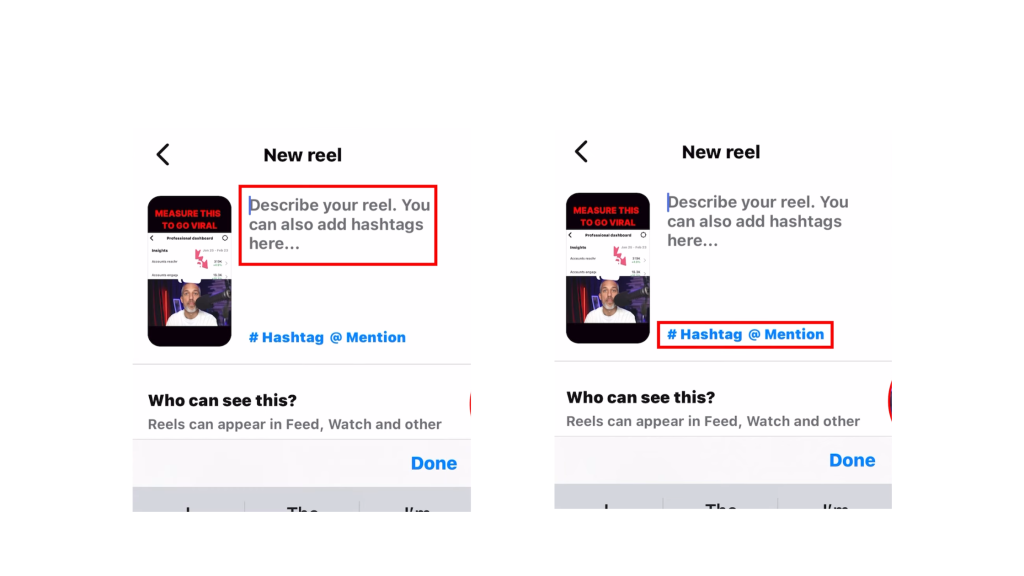
Writing a compelling description for your reel is crucial. Think of it like a regular Facebook post. You want to grab your audience’s attention and encourage them to watch your reel.
Description Tips
- Bold Text: Descriptions appear bolder in the newsfeed, making them stand out.
- Use Engaging Language: Write in a way that grabs attention. Start with bigger words to draw people in.
- Hashtags: Adding a relevant hashtag or two can increase visibility.
Advanced Features of Reels

Facebook provides advanced features to elevate your reels. The Groove feature lets you edit videos to the music’s beat, perfect for highlight reels or quick cuts. It enables you to combine multiple images into a single reel, automatically synced to the music. This offers a hassle-free way to create engaging content effortlessly.
How it works
- Upload Your Clips: This works exceptionally well for clips from events, conferences, or showing different aspects of your work.
- Automatic Editing: Groove will cut your video to the beat of the selected music.
- Song Options: You can choose from various songs to fit the mood of your reel.
Organizing and Publishing Your Facebook Reels
You’ve put in the work, and crafted your reel to perfection, and now it’s time to get it out there for the world to see. But hold up. Before you hit that publish button, there are a few things you need to know about organizing and publishing your Facebook Reels.
Organizing Your Reels

To keep things organized, save all of your reels in a specific folder on your phone. This makes it easy to locate and upload them later.
- Create a Reels Folder: Store all your reels in one place.
- Easy Access: This helps when you need to upload multiple reels quickly.
Publish or Save as Draft

Once you’re done editing, you have two options:
- Save as Draft: Ideal if you want to make more changes later. Remember, the thumbnail and text won’t be saved.
- Share Now: If everything is ready, go ahead and publish your reel.
Avoid Cross-Posting
It might be tempting to cross-post your reels from Instagram to Facebook or vice versa, but this can actually hurt your performance. We’ve noticed that cross-posting often leads to one platform underperforming.


Why Regular Posting Matters
Now, let’s talk about consistency. If you want to build a loyal following on Facebook, you need to be posting regularly. This doesn’t mean you have to post every day (although if you can, more power to you.), but you should aim for a consistent schedule.
Why is this so important? Well, think about it. If you only post sporadically, your followers might forget about you. But if you’re consistently showing up in their feed with new and exciting content, they’re more likely to engage with your reels and keep coming back for more.
Plus, the more you post, the more opportunities you have to experiment with different types of content and see what resonates with your audience. It’s all about finding that sweet spot between quality and quantity.
Alright, you’ve got the lowdown on how to make your Facebook Reels pop. It all boils down to three things: planning ahead, staying organized, and sticking to a schedule. Master these, and you’ll be well on your way to creating reels that not only look polished but also get the attention they deserve.


Conclusion
And there you have it – your crash course in how to publish reels on Facebook like a total pro. By now, you should have a solid grasp on creating engaging content, adding those all-important finishing touches, and getting your reel in front of the right audience.
Here’s the secret to reel success: enjoy the process and let your personality take center stage. Play around with various styles, themes, and techniques to discover what clicks with your audience.
So what are you waiting for? Get out there and start publishing those Facebook Reels! With a little practice and persistence, you’ll be racking up the views, likes, and shares in no time.


